Track
Creates a track model using user-defined templates and design speed.
Workflow
From the
 Display rail placement tools,
select Track to start the place track tool.
Display rail placement tools,
select Track to start the place track tool.
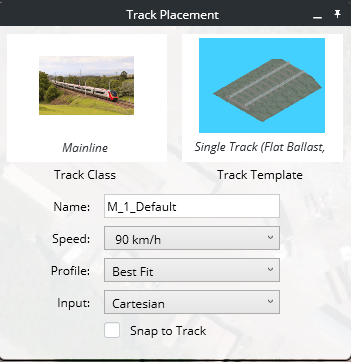
- Select the track class. Select High Speed, Mainline, Secondary Mainline, or Branchline Yard.
- Select the track template to use. Specify speed and profile.
- Click to enter the first PI.
- Move the mouse and click again to place more PI as needed.
- To accept and complete the track placement, right-click. The track is created.
| Setting | Description |
|---|---|
| Track Class | Prior to designing your track, select a track class. |
| Track Template | Click Track Template to open the Templates dialog to select a template to be used. |
| Track Name | Name of track to be created. A default name is always specified (incremental number) so every track has a unique name. |
| Speed | Design speed of the track. The drop down list specifies the speed. Miles per hour (MPH) or Kilometers per hour (Km/h) are used based on the Set Display Units selected in the settings section. By default, the speed is set based on the selected track class. |
| Profile | By default, the Best Fit option is selected and the track is created with the best fit on existing ground vertically. Selecting the Straight option from the Profile drop down menu creates the track by placing a straight line between the PI. |
| Input | Places the road with either polar or cartesian input coordinates. |
| Snap to Track | Enable to automatically snap to end of tracks. Snapping for end of turnouts is on by default, this option is only for snapping to end of other tracks. This should not be selected when it is not needed as this may degrade performance. |